Methods
Basic usage
// init with autoRegister:false to manually subscribe later
CleverPush.initWithLaunchOptions(launchOptions,
  channelId: "YOUR_CHANNEL_ID_HERE",
  handleNotificationReceived:{ result in
    if let value = result?.notification.value(forKey: "url") {
      print("Received Notification with URL: \(value)")
    }
  },
  handleNotificationOpened:{ result in
    if let value = result?.notification.value(forKey: "url") {
      print("Opened Notification with URL: \(value)")
    }
  },
  handleSubscribed:{ subscriptionId in
    print("Subscribed to CleverPush with ID: \(subscriptionId ?? "")")
  },
  autoRegister: false
)

//get the locally stored notification.
let localNotifications = CleverPush.getNotifications()

// get remote notification and local notification based on the boolean argument.
// - if you pass boolean argument true you will get the list of remote notification else you will get the locally stored notification.
CleverPush.getNotifications(true, callback: { remoteNotification in
    print(remoteNotification as Any)
})

// subscribe
CleverPush.subscribe()

// unsubscribe later
CleverPush.unsubscribe()

// get subscription status
let isSubscribed = CleverPush.isSubscribed()
// init with autoRegister:false to manually subscribe later
[CleverPush initWithLaunchOptions:launchOptions
            channelId:@"YOUR_CHANNEL_ID_HERE"
            handleNotificationReceived:^(CPNotificationReceivedResult *result) {
              NSLog(@"Received Notification with URL: %@", [result.notification valueForKey:@"url"]);
            handleNotificationOpened:^(CPNotificationOpenedResult *result) {
              NSLog(@"Opened Notification with URL: %@", [result.notification valueForKey:@"url"]);
            } handleSubscribed:^(NSString *subscriptionId) {
                NSLog(@"Subscribed to CleverPush with ID: %@", subscriptionId);
            }
            autoRegister:NO
];

//get the locally stored notification.
NSArray *localNotifications = [CleverPush getNotifications];

// get remote notification and local notification based on the boolean argument.
// - if you pass boolean argument YES you will get the list of remote notification else you will get the locally stored notification.
[CleverPush getNotifications:YES callback:^(NSArray *remoteNotification) {
    NSLog(@"%@", remoteNotification);
 }];

// subscribe
[CleverPush subscribe]

// unsubscribe later
[CleverPush unsubscribe]

// get subscription status
BOOL isSubscribed = [CleverPush isSubscribed]
Mark/Unmark Subscription As Test
You can mark or unmark a subscription as a test subscription.
Mark Subscription As Test
(Available from version 1.34.43)
Marks the current subscription as a test subscription.
Call this method after CleverPush has been initialized and a subscription ID is available.
// Mark subscription as test
CleverPush.markSubscriptionAsTest()

// Mark subscription as test with success/failure callbacks
CleverPush.markSubscriptionAsTest(onSuccess: { results in
    // success
}, onFailure: { error in
    // handle error
})
// Mark subscription as test
[CleverPush markSubscriptionAsTest];

// Mark subscription as test with success/failure callbacks
[CleverPush markSubscriptionAsTestOnSuccess:^(NSDictionary *results) {
    // success
} onFailure:^(NSError *error) {
    // handle error
}];
Unmark Subscription As Test
(Available from version 1.34.47)
To unmark a subscription as test. Removes the test status from the current subscription.
Call this method after CleverPush has been initialized and a subscription ID is available.
// Unmark subscription as test
CleverPush.unmarkSubscriptionAsTest()

// Unmark subscription as test with success/failure callbacks
CleverPush.unmarkSubscriptionAsTest(onSuccess: { results in
    // success
}, onFailure: { error in
    // handle error
})
// Unmark subscription as test
[CleverPush unmarkSubscriptionAsTest];

// Unmark subscription as test with success/failure callbacks
[CleverPush unmarkSubscriptionAsTest:^(NSDictionary *results) {
    // success
} onFailure:^(NSError *error) {
    // handle error
}];
Tags
// get available tags
let channelTags = CleverPush.getAvailableTags()

// add/remove tag with action callback
CleverPush.addSubscriptionTag("TAG_ID", callback: { tagId in
    print(tagId as Any)
})

CleverPush.removeSubscriptionTag("TAG_ID", callback: { tagId in
    print(tagId as Any)
})

// add/remove multiple tags with action callback
let tags = ["TAG_ID1", "TAG_ID2"];

CleverPush.addSubscriptionTags(tags, callback: { addedTags in
    print(addedTags as Any)
})

CleverPush.removeSubscriptionTags(tags, callback: { remainingTags in
    print(remainingTags as Any)
})

// add/remove tag without action callback
CleverPush.addSubscriptionTag("TAG_ID")
CleverPush.removeSubscriptionTag("TAG_ID")

// add/remove multiple tags without action callback
CleverPush.addSubscriptionTags(tags)
CleverPush.removeSubscriptionTags(tags)

let hasTag = CleverPush.hasSubscriptionTag("TAG_ID")

let subscriptionTags = CleverPush.getSubscriptionTags()
let subscriptionTopics = CleverPush.getSubscriptionTopics()
CleverPush.setSubscriptionTopics(["ID_1", "ID_2"])
// get available tags
NSArray* channelTags = [CleverPush getAvailableTags];

// add/remove tag with action callback
[CleverPush addSubscriptionTag:@"TAG_ID" callback:^(NSString *tagId) {
    NSLog(@"%@",tagId);
}];

[CleverPush removeSubscriptionTag:@"TAG_ID" callback:^(NSString *tagId) {
    NSLog(@"%@",tagId);
}];

// add/remove multiple tags with action callback
NSArray *tags = @[@"TAG_ID1", @"TAG_ID2"];

[CleverPush addSubscriptionTags:tags callback:^(NSArray *addedTags) {
    NSLog(@"%@",addedTags);
}];

[CleverPush removeSubscriptionTags:tags callback:^(NSArray *remainingTags) {
    NSLog(@"%@",remainingTags);
}];

// add/remove tag without action callback
[CleverPush addSubscriptionTag:@"TAG_ID"];
[CleverPush removeSubscriptionTag:@"TAG_ID"];

// add/remove multiple tags without action callback
[CleverPush addSubscriptionTags:tags];
[CleverPush removeSubscriptionTags:tags];

BOOL hasTag = [CleverPush hasSubscriptionTag:@"TAG_ID"];

NSArray* subscriptionTags = [CleverPush getSubscriptionTags];
NSArray* subscriptionTopics = [CleverPush getSubscriptionTopics];
[CleverPush setSubscriptionTopics:@{@"ID_1", @"ID_2"}];
Automatic Tag Assignment
The SDK can also automatically assign tags by using the trackPageView method. In simple cases you can just give the method a URL. In the CleverPush backoffice you can then set trigger the tags by matching URL Pathname RegExes. You can optionally also set combinations of min. visits, seconds or sessions for this tag.
Let's say you have created a tag with the URL pathname regex "/sports". This would trigger the tag for a subscriber:
CleverPush.trackPageView("https://example.com/sports/article-123123")
[CleverPush trackPageView:@"https://example.com/sports/article-123123"];
We can also have more advanced use cases here by using Javascript functions for matching. For example you created a tag with the following function in the CleverPush backend: params.category === "sports". This would then trigger the tag for a subscriber:
CleverPush.trackPageView("https://example.com/anything", params: ["category" : "sports"])
[CleverPush trackPageView:@"https://example.com/anything" params:[NSDictionary dictionaryWithObjectsAndKeys: @"sports", @"category", nil]];
Once the trackPageView method has been implemented you can set up all the tags dynamically in the CleverPush backend without touching your code.
Topics
//set the tint color for the topic attributes (save button and switches)
CleverPush.setNormalTintColor(UIColor .systemPurple);

//set branding color while you're going to enable highlighting newly added topic
CleverPush.setBrandingColor(UIColor .systemRed);

// get all the subscription topics
let subscriptionTopics = CleverPush.getSubscriptionTopics()

// set multiple subscription topics
CleverPush.setSubscriptionTopics(["ID_1", "ID_2"])

// get all the available topics
CleverPush.getAvailableTopics { channelTopics_ in
    print(channelTopics_ as Any)
}

// add a single topic
CleverPush.addSubscriptionTopic("ID_1")

// remove a single topic
CleverPush.removeSubscriptionTopic("ID_1")

let hasTopic = CleverPush.hasSubscriptionTopic("TOPIC_ID");

// let the user choose his topics
CleverPush.showTopicsDialog()
//set the tint color for the topic attributes (save button and switches)
[CleverPush setNormalTintColor:[UIColor systemPurpleColor]];

//set branding color while you're going to enable highlighting newly added topic
[CleverPush setBrandingColor:[UIColor systemRedColor]];

// get all the subscription topics
NSArray* subscriptionTopics = [CleverPush getSubscriptionTopics];

// set multiple subscription topics
[CleverPush setSubscriptionTopics:@{@"ID_1", @"ID_2"}];

// get all the available topics
[CleverPush getAvailableTopics:^(NSArray* channelTopics_) {
    NSLog(@"CleverPush: Available topics %@", channelTopics_);
}];

// add a single topic
[CleverPush addSubscriptionTopic:@"ID_1"];

// remove a single topic
[CleverPush removeSubscriptionTopic:@"ID_1"];

BOOL hasTopic = [CleverPush hasSubscriptionTopic:@"TOPIC_ID"];

// let the user choose his topics
[CleverPush showTopicsDialog];

[CleverPush setTopicsChangedListener:^(NSArray* topicsIds) {
    NSLog(@"CleverPush: Changed topicsIds %@", topicsIds);
});
Here is how the topics dialog looks like:
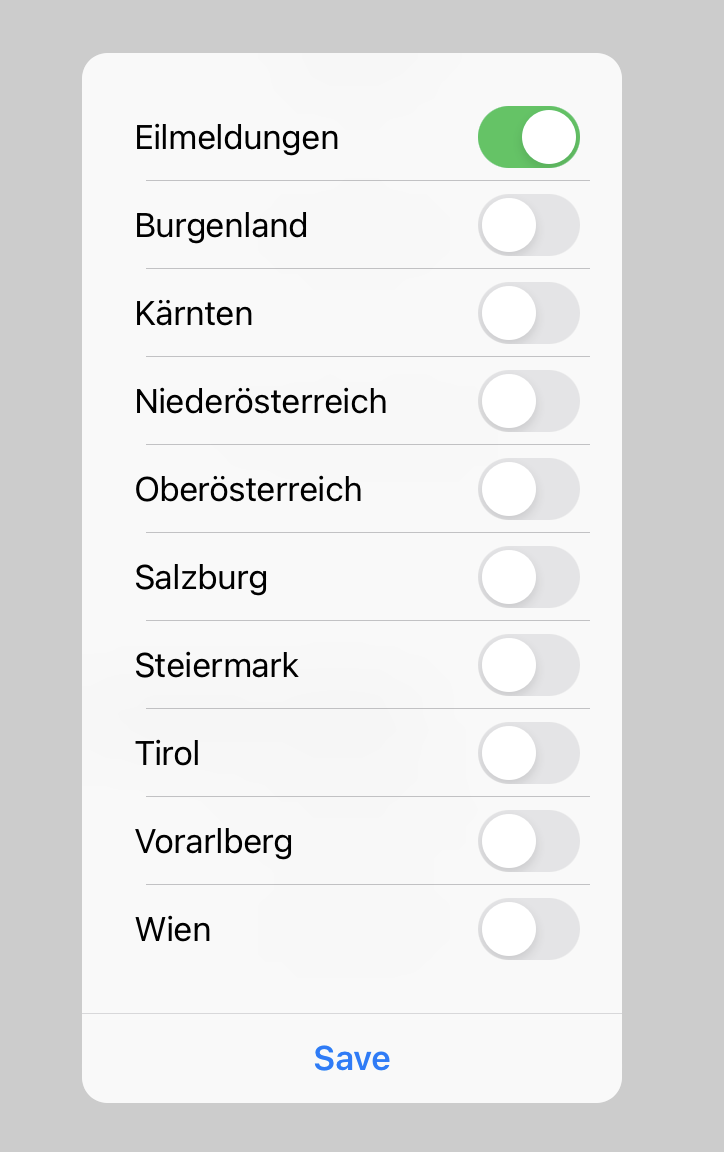
Attributes
// Retrieve all available attributes
CleverPush.getAvailableAttributes { availableAttributes in
    print(availableAttributes as Any)
}

// Get all subscription attributes
let subscriptionAttributes = CleverPush.getSubscriptionAttributes()

// Get a single subscription attribute value
let attributeValue = CleverPush.getSubscriptionAttribute("ATTRIBUTE_ID")

// Set a string value
CleverPush.setSubscriptionAttribute("ATTRIBUTE_ID", value: "ATTRIBUTE_VALUE")

// Set an array of strings
let valArray = ["ATTRIBUTE_VALUE_ONE", "ATTRIBUTE_VALUE_TWO", "ATTRIBUTE_VALUE_THREE", "ATTRIBUTE_VALUE_FOUR"]
CleverPush.setSubscriptionAttribute("ATTRIBUTE_ID", arrayValue: valArray)

// Please provide dates in the following format: YYYY-MM-DD
CleverPush.setSubscriptionAttribute("birthdate", value: "2020-06-21")

// Remove a single attribute
CleverPush.removeSubscriptionAttribute("ATTRIBUTE_ID")

// Remove a single attribute with success/failure callback
CleverPush.removeSubscriptionAttribute("ATTRIBUTE_ID", callback: { attributeId in
    // success, attributeId is the removed attribute key
}, onFailure: { error in
    // handle error
})

//// Remove multiple attributes
CleverPush.removeSubscriptionAttributes(["ATTRIBUTE_ID1", "ATTRIBUTE_ID2", "ATTRIBUTE_ID3"])
// Retrieve all available attributes
[CleverPush getAvailableAttributes^(NSDictionary* availableAttributes) {
    NSLog(@"CleverPush: Available attributes %@", availableAttributes);
}];

// Get all subscription attributes
NSDictionary* subscriptionAttributes = [CleverPush getSubscriptionAttributes];

// Get a single subscription attribute value
NSString* attributeValue = [CleverPush getSubscriptionAttribute:@"ATTRIBUTE_ID"];

// Set a string value
[CleverPush setSubscriptionAttribute:@"ATTRIBUTE_ID" value:@"ATTRIBUTE_VALUE"];

// Set an array of strings
NSArray *valArray = @[@"ATTRIBUTE_VALUE_ONE", @"ATTRIBUTE_VALUE_TWO", @"ATTRIBUTE_VALUE_THREE", @"ATTRIBUTE_VALUE_FOUR"];
[CleverPush setSubscriptionAttribute:@"ATTRIBUTE_ID" arrayValue:valArray];

// Please provide dates in the following format: YYYY-MM-DD
[CleverPush setSubscriptionAttribute:@"birthdate" value:@"2020-06-21"];

// Remove a single attribute
[CleverPush removeSubscriptionAttribute:@"ATTRIBUTE_ID"];

// Remove a single attribute with success/failure callback
[CleverPush removeSubscriptionAttribute:@"ATTRIBUTE_ID" callback:^(NSString *attributeId) {
    // success
} onFailure:^(NSError *error) {
    // handle error
}];

// Remove multiple attributes
[CleverPush removeSubscriptionAttributes:@[@"ATTRIBUTE_ID1", @"ATTRIBUTE_ID2", @"ATTRIBUTE_ID3"]];
// You can also push/pull values to special array attributes (e.g. "categories")
CleverPush.pushSubscriptionAttributeValue("categories", value: "category_1");
CleverPush.pullSubscriptionAttributeValue("categories", value: "category_1");
[CleverPush pushSubscriptionAttributeValue:@"categories" value:@"category_1"];

[CleverPush pullSubscriptionAttributeValue:@"categories" value:@"category_1"];
Country & Language
You can optionally override the country & language which is automatically detected from the system and can be used for targeting / translations.
CleverPush.setSubscriptionLanguage("en");
CleverPush.setSubscriptionCountry("US");
[CleverPush setSubscriptionLanguage:@"en"];
[CleverPush setSubscriptionCountry: @"US"]
Received Notifications
(App Group from setup step 10 is required):
let notifications = CleverPush.getNotifications() as? [CPNotification]
print(notifications as Any)
print(notifications?[0].id as String)
NSArray* notifications = [CleverPush getNotifications];
Remove Notification
You can remove notification stored locally using Notification ID
CleverPush.removeNotification("notification_Id")
[CleverPush removeNotification:@"notification_Id"];
Remove all notifications from local storage
(Available from version 1.34.37)
You can remove all notifications stored locally using the following method (this does not clear any notifications from notification center):
CleverPush.removeAllNotifications()
[CleverPush removeAllNotifications];
App Banners
(Available from version 1.3.0)
CleverPush.setAppBannerOpenedCallback { (_: CPAppBannerAction?) in
        print("App Banner Opened")
}

// You can also show one banner by its ID (we recommend app banner events for production usage)
CleverPush.showAppBanner("BANNER_ID")

// You can show a banner by its ID and receive a callback when it is dismissed (available from version 1.34.7).
CleverPush.showAppBanner("APP_BANNER_ID") {
        print("App banner was dismissed");
};
[CleverPush setAppBannerOpenedCallback:^(CPAppBannerAction *action) {
  NSLog(@"App Banner Opened");
}];

// You can also show one banner by its ID (we recommend app banner events for production usage)
[CleverPush showAppBanner:@"BANNER_ID"];

// You can show a banner by its ID and receive a callback when it is dismissed (available from version 1.34.7).
[CleverPush showAppBanner:@"APP_BANNER_ID" appBannerClosedCallback:^{
        NSLog(@"App banner was dismissed");
}];
Get banners by group ID
CleverPush.getAppBanners(byGroup: groupId) { banners in
  // do something with the banners
}
[CleverPush getAppBannersByGroup:groupId callback:^(NSArray<CPAppBanner *> *banners) {
  // do something with the banners
}];
Custom Fonts for App Banners
You can apply custom fonts to app banner text and buttons to match your app branding.
Supported Font Formats
The following font formats are supported:
.ttf- TrueType.otf- OpenType
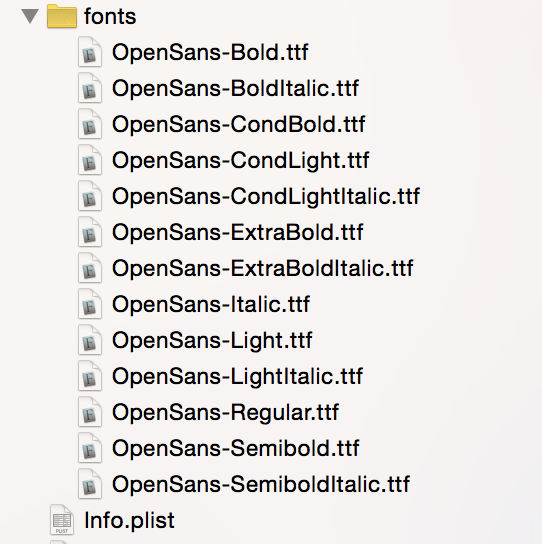
Step 1: Add the font files to your iOS app
- Drag your font files (for example
OpenSans-Regular.ttf) into your Xcode project. - Make sure the files are added to your app target.
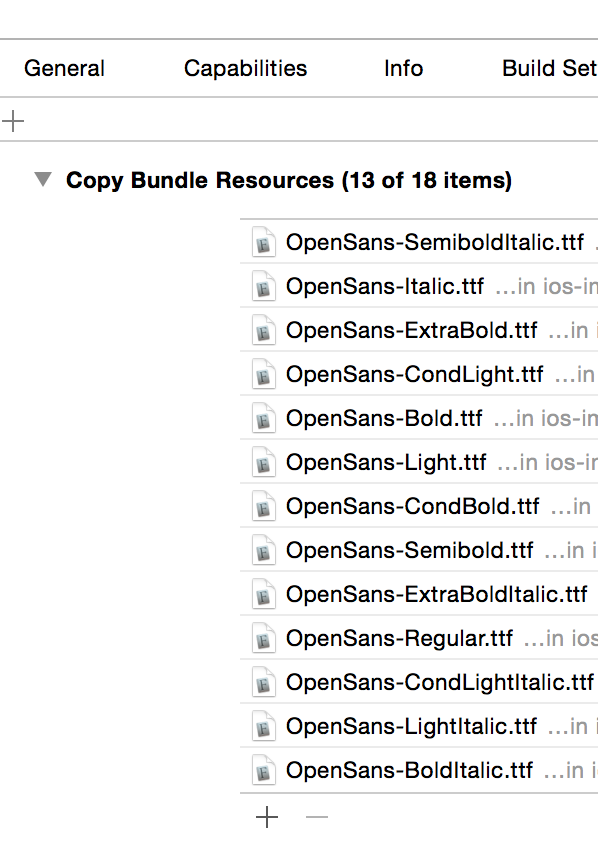
- Verify they appear in Build Phases -> Copy Bundle Resources.
Example (font files in project):
Example (Copy Bundle Resources):
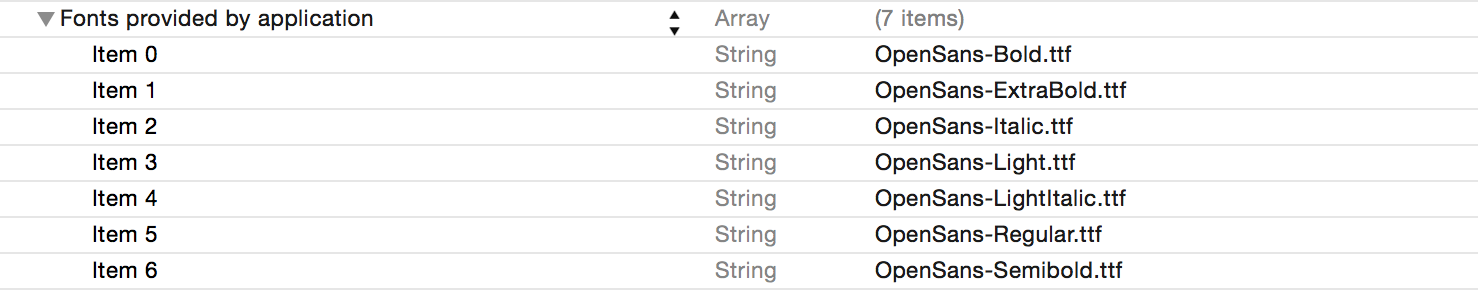
Step 2: Register fonts in Info.plist
Add the Fonts provided by application (UIAppFonts) key and list all font files (with extension):
<key>UIAppFonts</key>
<array>
  <string>OpenSans-Regular.ttf</string>
  <string>OpenSans-Bold.ttf</string>
  <string>OpenSans-Italic.ttf</string>
  <string>OpenSans-Light.ttf</string>
  <string>OpenSans-LightItalic.ttf</string>
  <string>OpenSans-Semibold.ttf</string>
  <string>OpenSans-ExtraBold.ttf</string>
</array>
Example (UIAppFonts in Info.plist):
Step 3: Use the iOS font name in your App Banner
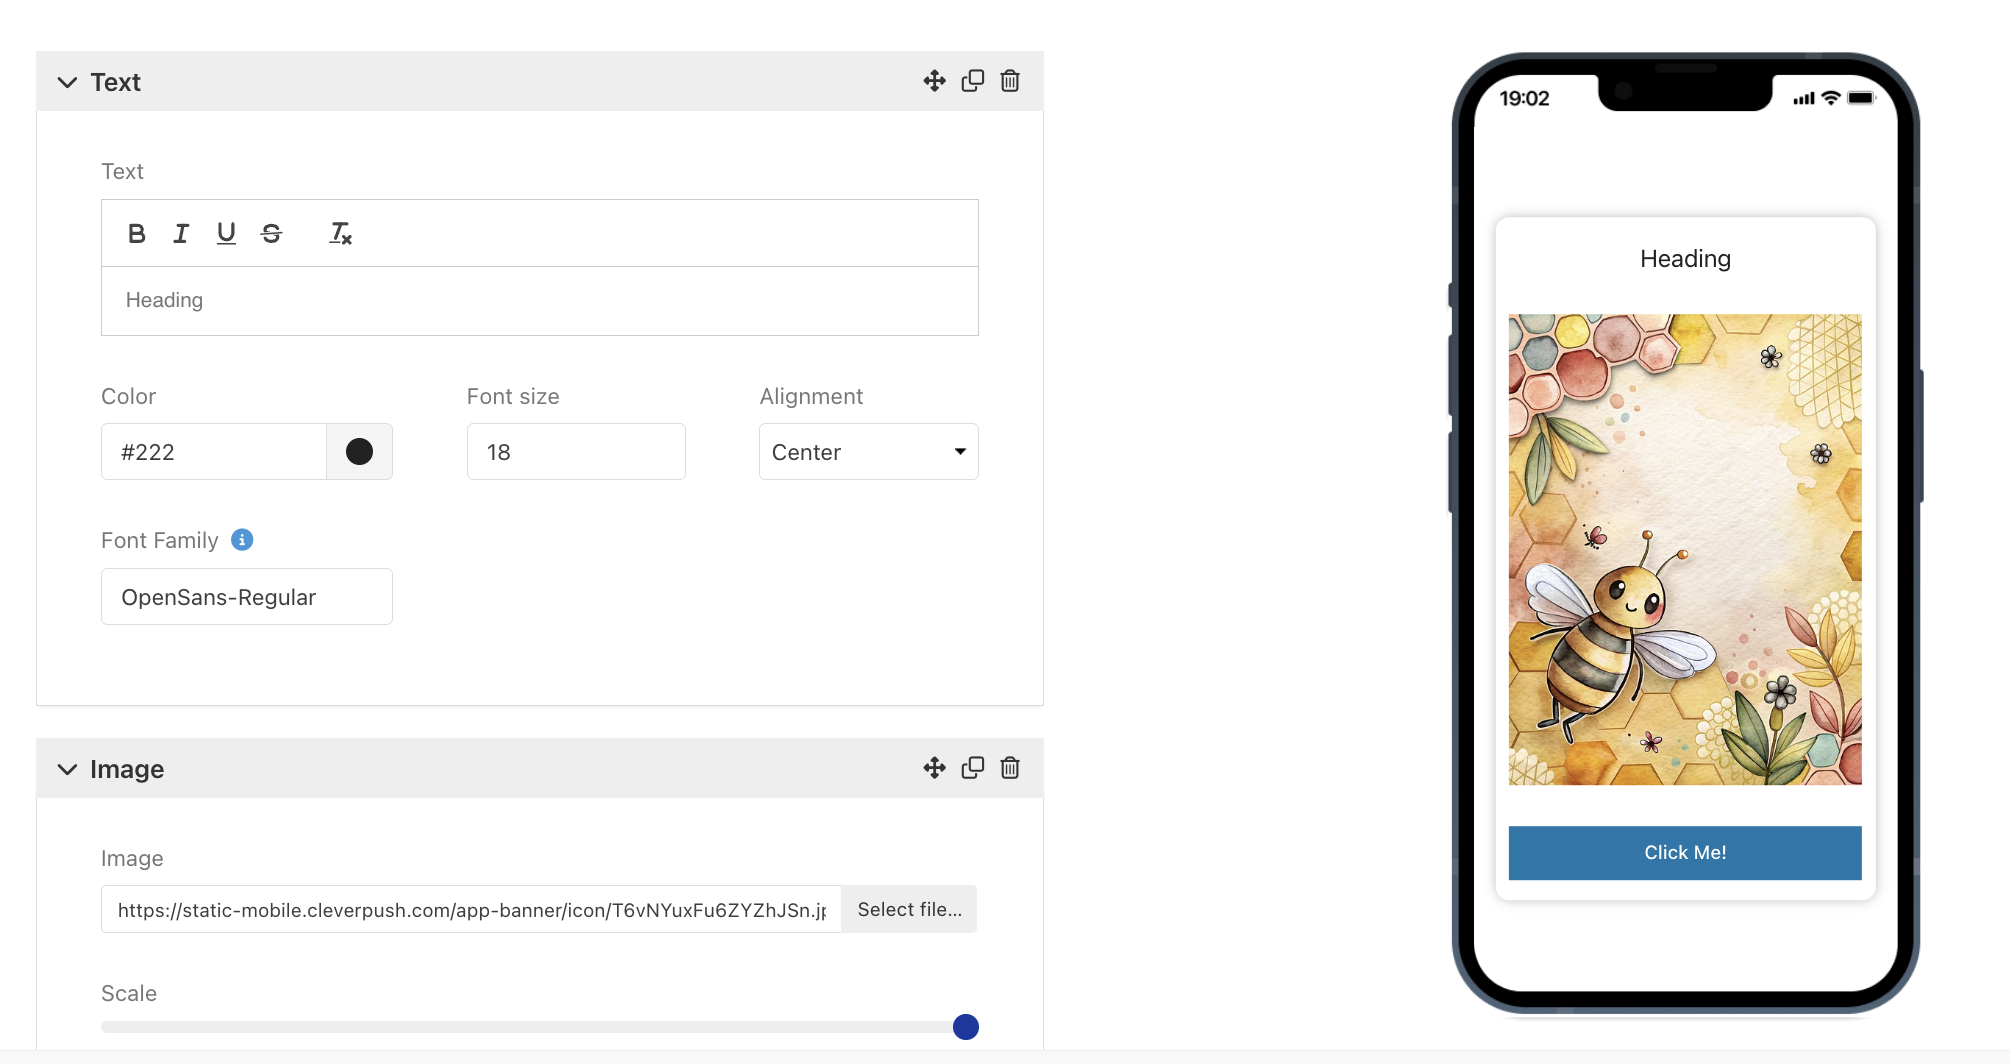
When configuring the banner font in the CleverPush dashboard:
- Use the iOS internal font name (PostScript name), not necessarily the file name.
- Example: file
OpenSans-Regular.ttfcan expose a font name likeOpenSans-Regular. - Set the Font Family field to
OpenSans-Regular.
Example (CleverPush dashboard font field):
You can verify a font name in code:
if let font = UIFont(name: "OpenSans-Regular", size: 16) {
  print("Loaded font: \(font.fontName)")
}
UIFont *font = [UIFont fontWithName:@"OpenSans-Regular" size:16];
if (font) {
  NSLog(@"Loaded font: %@", font.fontName);
}
Use this resolved font name in the App Banner font fields.
Step 4: Build and test
- Rebuild and run your iOS app.
- Trigger the app banner.
- Confirm custom fonts are applied to the banner text and buttons.
Fallback Behavior
If the custom font is missing, named incorrectly, or cannot be loaded, the SDK falls back to the system font so the banner remains readable.
Disabling banners
You can also disable app banners temporarily, e.g. during a splash screen. Banners are enabled by default.
If a banner would show during this time, it is added to an internal queue and shown when calling enableAppBanners.
CleverPush.disableAppBanners();
CleverPush.enableAppBanners();
[CleverPush disableAppBanners];
[CleverPush enableAppBanners];
Non-blocking banners
(Available from version 1.34.45)
By default, app banners block user interaction with the app while they are visible. You can allow users to interact with the app while an in-app banner is displayed by enabling the non-blocking mode.
Call this before initializing the SDK
CleverPush.setAppBannersNonBlocking(true);
[CleverPush setAppBannersNonBlocking:YES];
To restore the default blocking behaviour:
CleverPush.setAppBannersNonBlocking(false);
[CleverPush setAppBannersNonBlocking:NO];
Development mode
You can enable the development mode to disable caches for app banners, so you always see the most up to date version.
CleverPush.enableDevelopmentMode();
[CleverPush enableDevelopmentMode];
HTML Banners
CleverPush supports various JavaScript functions which can be called from HTML banners:
CleverPush.subscribe();
CleverPush.unsubscribe();
CleverPush.closeBanner();
CleverPush.trackEvent(eventId, propertiesObject);
CleverPush.trackClick(buttonId);
CleverPush.trackClick(buttonId, customDataObject);
CleverPush.openWebView(url);
CleverPush.setSubscriptionAttribute(attributeId, value);
CleverPush.addSubscriptionTag(tagId);
CleverPush.removeSubscriptionTag(tagId);
CleverPush.setSubscriptionTopics(topicIds);
CleverPush.addSubscriptionTopic(topicId);
CleverPush.removeSubscriptionTopic(topicId);
CleverPush.showTopicsDialog();
CleverPush.handleLinkBySystem('mailto:example@email.com'); // support multiple link types, including `mailto:`, `tel:`, `market/Play Store`, and standard `http/https` links.
Event Tracking
Events can be used to track conversions or trigger app banners.
CleverPush.trackEvent("EVENT NAME")

// track an event with custom properties
CleverPush.trackEvent("EVENT NAME", properties: ["property-1": "value"])

// track an event with a specified amount
CleverPush.trackEvent("EVENT NAME", amount: 37.50)
[CleverPush trackEvent:@"EVENT NAME"];

// track an event with custom properties
[CleverPush trackEvent:@"EVENT NAME" properties:@{
  @"property-1": @"value"
}];

// track an event with a specified amount
[CleverPush trackEvent:@"EVENT NAME" amount:37.50];
Follow up Events
Deprecated: Use trackEvent instead to trigger Follow-ups via Events.
Events can be used to trigger follow-up campaigns.
CleverPush.triggerFollowUpEvent("EVENT NAME")

// add custom parameters
CleverPush.triggerFollowUpEvent("EVENT NAME", ["id": "123456"])
[CleverPush triggerFollowUpEvent:@"EVENT NAME"];

// add custom parameters
[CleverPush triggerFollowUpEvent:@"EVENT NAME" parameters:@{@"id": @"123456"}];
Tracking Consent
You can optionally require a tracking consent from the user (e.g. you get this consent from a CMP). If you tell our SDK to wait for the tracking consent, it will not call any tracking-related features until the consent is available. Calls will be queued and automatically executed until the consent is available.
Step 1: Call this before initializing the SDK:
CleverPush.setTrackingConsentRequired(true)
[CleverPush setTrackingConsentRequired:YES];
Step 2: Call this when the user gave his consent (needs to be called on every launch):
CleverPush.setTrackingConsent(true)
[CleverPush setTrackingConsent:YES];
Authorization Token
You can set an authorization token that will be used in an API call.
CleverPush.setAuthorizerToken("YOUR_AUTH_TOKEN_HERE")
[CleverPush setAuthorizerToken:@"YOUR_AUTH_TOKEN_HERE"];
TCF2 CMP
You can set IabTcfMode. Perform subscribe or tracking according to IabTcfMode if vendor consent is 1.
Call this before initializing the SDK
// IabTcfModes are .subscribeWaitForConsent, .trackingWaitForConsent, .disabled
CleverPush.setIabTcfMode(.subscribeWaitForConsent)
// IabTcfModes are CPIabTcfModeSubscribeWaitForConsent, CPIabTcfModeTrackingWaitForConsent, CPIabTcfModeDisabled
[CleverPush setIabTcfMode:CPIabTcfModeSubscribeWaitForConsent];
Implementation of App Banner Delegate for Displaying Banners on Custom View Controllers
Implemented an App Banner Delegate feature allowing the display of banners on custom view controllers. This feature introduces a custom delegate or protocol for passing a view controller, enabling the presentation of banners on specific, user-defined views.
CleverPush.setShowAppBannerCallback { viewController in
            print("App Banner will be displayed on ViewController: \(viewController)")
            // Implement your logic to show the banner on the provided viewController
        }
[CleverPush setShowAppBannerCallback:^(UIViewController *viewController) {
        NSLog(@"App Banner will be displayed on ViewController: %@", viewController);
        // Implement your logic to show the banner on the provided viewController
    }];
Auto Request Notification Permission
You can diable the notification permission dialog while subscribe.
Default autoRequestNotificationPermission value is true so while subscribing it checks that if notification permission is not given then it will display the dialog. By seting autoRequestNotificationPermission value to false notification permission dialog will not display if permission is not given while subscribe.
// This method sets the boolean variable true or false.
CleverPush.setAutoRequestNotificationPermission(false)
// This method sets the boolean variable true or false.
[CleverPush setAutoRequestNotificationPermission:FALSE];
Auto Resubscribe
You can perform auto resubscribe whenever app open if the user has given notification permission and subscriptionId is null.
Default autoResubscribe value is false. By seting autoResubscribe value to true whenever app open it checks that the user has given notification permission and subscriptionId is null then perform subscribe.
// This method sets the boolean variable true or false.
CleverPush.setAutoResubscribe(true)
// This method sets the boolean variable true or false.
[CleverPush setAutoResubscribe:TRUE];
Set Local Track Event Retention Days
App Banners: Targeting by events from previous sessions
Added the Add Event feature in the Targeting section in the app banner. Where you can set the last x days event called and fulfil the specific condition then the banner will display.
E.g in last 5 days between from 5 to 10 event TEST. It will store the banner event data in a local database and check from the current date to till next five days. If the event called count for that particular banner is between 5 to 10 or not. If it's between those values then the banner will display otherwise not. After 5 days banner will not display.
To delete the local database's table entry need to set trackEventRetentionDays. The default days are 90 days. It will check each record's createdDateTime, if it's greater than trackEventRetentionDays then that data will be deleted from the table.
Call this before initializing the SDK
CleverPush.setLocalEventTrackingRetentionDays(20)
[CleverPush setLocalEventTrackingRetentionDays:20];
Set Application Notification Badge Count
You can set or get your application's badge count using the methods provided below.
- to get the application notification badge count
CleverPush.getBadgeCount{ badge in
            print("Badge Count = %ld",badge)
      }
[CleverPush getBadgeCount:^(NSInteger badge) {
        NSLog(@"Badge Count = %ld",badge);
    }];
- to set the application notification badge count
CleverPush.setBadgeCount(10)
[CleverPush setBadgeCount:10];
Handling Universal Links
When handling deep links automatically (setting in the CleverPush dashboard), you can instruct our SDK to open universal links (starting with http) inside the app instead of passing it as a deep link to the system. This is required to make universal links work.
- To specify which domains should be handled as universal links inside the app, you can use the
setHandleUniversalLinksInAppForDomainsmethod. This method allows you to pass an array of domains. If a URL's domain matches any of the specified domains, we will pass that matched URL as an NSUserActivity to the app itself.
let domains = ["domain1.com", "domain2.com","cleverpush.com"]
CleverPush.setHandleUniversalLinksInApp(forDomains: domains)
NSArray<NSString *> *domains = @[@"domain1.com", @"domain2.com",@"cleverpush.com"];
[CleverPush setHandleUniversalLinksInAppForDomains:domains];
- You can then simply handle the Deep Links within your AppDelegate/SceneDelegate code like shown in the examples below:
//For AppDelegate
func application(_ application: UIApplication,
                     continue userActivity: NSUserActivity,
                     restorationHandler: @escaping ([UIUserActivityRestoring]?) -> Void) -> Bool {
        print("URL = %@", userActivity.webpageURL)
        return true;
}

//For SceneDelegate
func scene(_ scene: UIScene, continue userActivity: NSUserActivity) {
        print("URL = %@", userActivity.webpageURL)
}
//For AppDelegate
- (BOOL)application:(UIApplication *)application continueUserActivity:(NSUserActivity *)userActivity restorationHandler:(void (^)(NSArray<id<UIUserActivityRestoring>> * _Nullable))restorationHandler {
    NSLog(@"URL = %@", userActivity.webpageURL);
   return true;
}

//For SceneDelegate
- (void)scene:(UIScene *)scene continueUserActivity:(NSUserActivity *)userActivity {
    NSLog(@"URL = %@", userActivity.webpageURL);
}
Customizing Notification Permissions And Settings
You can customize which notification permission options are requested when prompting the user for notification permissions.
These methods should be called before initializing the SDK to customize which notification permission options will be requested from the user. Each option can be enabled or disabled independently.
// Control whether notifications can show alerts (default: true)
CleverPush.setDisplayAlertEnabledForNotifications(true)

// Control whether notifications can play sounds (default: true)
CleverPush.setSoundEnabledForNotifications(true)

// Control whether notifications can update the app's badge count (default: true)
CleverPush.setBadgeCountEnabledForNotifications(true)
// Control whether notifications can show alerts (default: true)
[CleverPush setDisplayAlertEnabledForNotifications:YES];

// Control whether notifications can play sounds (default: true)
[CleverPush setSoundEnabledForNotifications:YES];

// Control whether notifications can update the app's badge count (default: true)
[CleverPush setBadgeCountEnabledForNotifications:YES];
Piano Segments
(Available from version 1.34.46)
You can set and retrieve Piano segments for a subscription.
Set Piano Segments
The setPianoSegments method allows you to sync Piano segments to a subscription.
CleverPush.setPianoSegments(["PIANO_SEGMENT_ID_1", "PIANO_SEGMENT_ID_2"])
[CleverPush setPianoSegments:@[@"PIANO_SEGMENT_ID_1", @"PIANO_SEGMENT_ID_2"]];
Get Piano Segments
The getSubscriptionPianoSegments method returns the Piano segments associated with the current subscription.
let segments = CleverPush.getSubscriptionPianoSegments()
NSArray<NSString *> *segments = [CleverPush getSubscriptionPianoSegments];