Methods
Initialization
Add the initialization code like this:
import CleverPush from 'cleverpush-capacitor-sdk';

const Home: React.FC = () => {
  useEffect(() => {
    const subscribedListener = ({ subscriptionId }) => {
      console.log('CleverPush subscriptionId:', subscriptionId);
    };

    const notificationReceivedListener = ({ notification }) => {
      console.log('CleverPush notification received:', JSON.stringify(notification));
    };

    const notificationOpenedListener = ({ notification }) => {
      console.log('CleverPush notification opened:', JSON.stringify(notification));
    };

    CleverPush.addListener('subscribed', subscribedListener);
    CleverPush.addListener('notificationReceived', notificationReceivedListener);
    CleverPush.addListener('notificationOpened', notificationOpenedListener);

    // set this to `false` to prevent the SDK from automatically subscribing the user on the first launch of the SDK
    const autoRegister = true;

    // You can get the Channel ID from your CleverPush channel settings
    CleverPush.init({
      channelId: "INSERT_YOUR_CHANNEL_ID",
      autoRegister: autoRegister
    });
  }, []);
};
Basic usage
Subscribe:
CleverPush.subscribe()
  .then(result => {
    console.log("Subscription ID:", result.subscriptionId);
  })
  .catch(error => {
    console.error("Subscription failed:", error);
  });
Unsubscribe:
CleverPush.unsubscribe();
Check if subscribed:
CleverPush.isSubscribed().then(({ isSubscribed }) => {

});
Get Subscription ID (after subscribe)
CleverPush.getSubscriptionId().then(({ subscriptionId }) => {

});
App Banners
This listener will be called when a button in an app banner is clicked.
const appBannerOpenedListener = (subscriptionId) => {
  console.log('CleverPush subscriptionId:', subscriptionId);
};

CleverPush.addListener('appBannerOpened', appBannerOpenedListener);
Automatic Tag Assignment
The SDK can also automatically assign tags by using the trackPageView method. In simple cases you can just give the method a URL. In the CleverPush backoffice you can then set trigger the tags by matching URL Pathname RegExes. You can optionally also set combinations of min. visits, seconds or sessions for this tag.
Let's say you have created a tag with the URL pathname regex "/sports". This would trigger the tag for a subscriber:
CleverPush.trackPageView({ url: "https://..." })
Tags
// add subscription tag
CleverPush.addSubscriptionTag({ tagId: "" })
// remove subscription tag
CleverPush.removeSubscriptionTag({ tagId: "" })
// check subscription tag exists or not
const hasTag = await CleverPush.hasSubscriptionTag({ tagId: "" })
// get subscription tags
const tags = CleverPush.getSubscriptionTags()
Topics
// set setSubscription topics
CleverPush.setSubscriptionTopics({ topics: ["", ""] })
// get subscription topics
const topics = await CleverPush.getSubscriptionTopics()
// get available topics
const availableTopics = await CleverPush.getAvailableTopics()
// let the user choose his topics
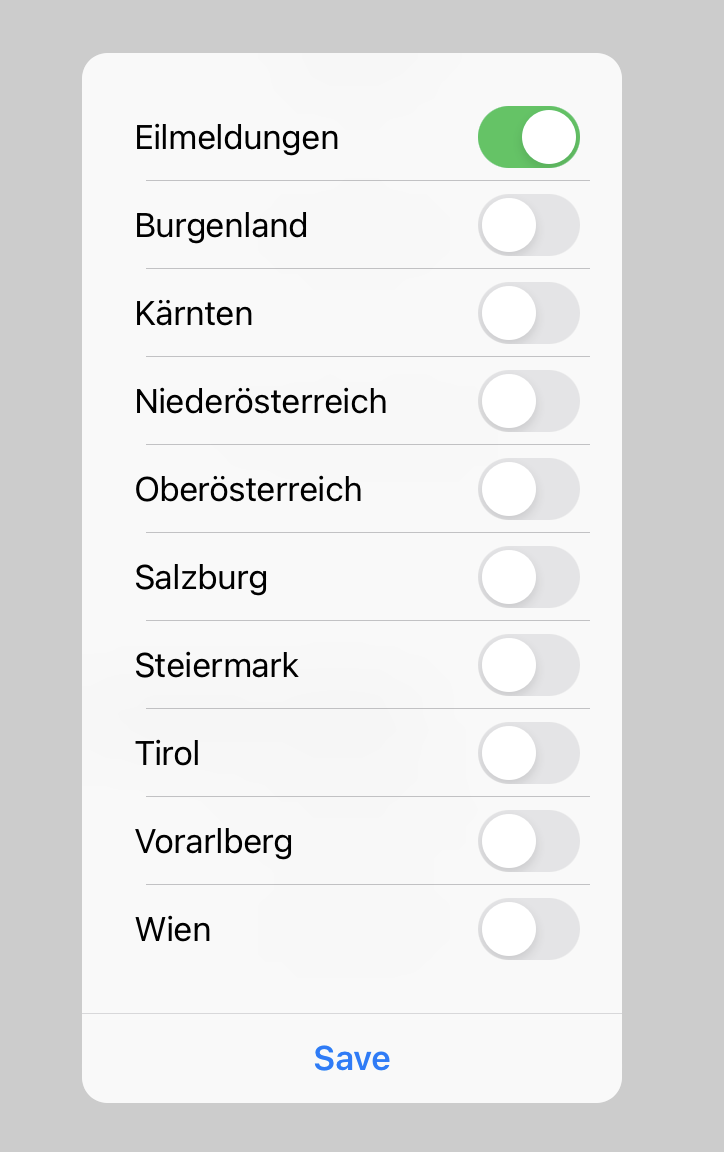
CleverPush.showTopicsDialog()
Here is how the topics dialog looks like:
Attributes
CleverPush.getAvailableAttributes()
CleverPush.getSubscriptionAttribute({attributeId:"ATTRIBUTE_ID"})
CleverPush.getSubscriptionAttributes()
// You can set string values like this
CleverPush.setSubscriptionAttribute({attributeId:"ATTRIBUTE_ID",value:"ATTRIBUTE_VALUE"})
// Please provide dates in the following format: YYYY-MM-DD
CleverPush.setSubscriptionAttribute({attributeId:"birthdate",value:"2020-06-21"})
Get received notifications:
const { notifications } = await CleverPush.getNotifications();
Development mode
You can enable the development mode to disable caches for app banners, so you always see the most up to date version.
CleverPush.enableDevelopmentMode()
Event Tracking
Events can be used to track conversions or trigger app banners.
CleverPush.trackEvent({eventName:"TRACK_EVENT_DATA"})

// track an event with custom properties
 CleverPush.trackEvent({
      eventName: "TRACK_EVENT_DATA",
      properties: {
        property1: 'value1',
        property2: 'value2'
      }
    });
Authorization Token
You can set an authorization token that will be used in an API call.
CleverPush.setAuthorizerToken({token:"set_Authorizer_Token"})